Surprisingly Easy IoT Device Management
A while ago I wrote a rather theoretical post about using GitOps for embedded devices. This time it is hands-on: With the tools Mender, git and Ansible I turn a minimal, headless Debian setup on a Raspberry Pi 4 into a kiosk terminal displaying a web page of choice in full screen mode:
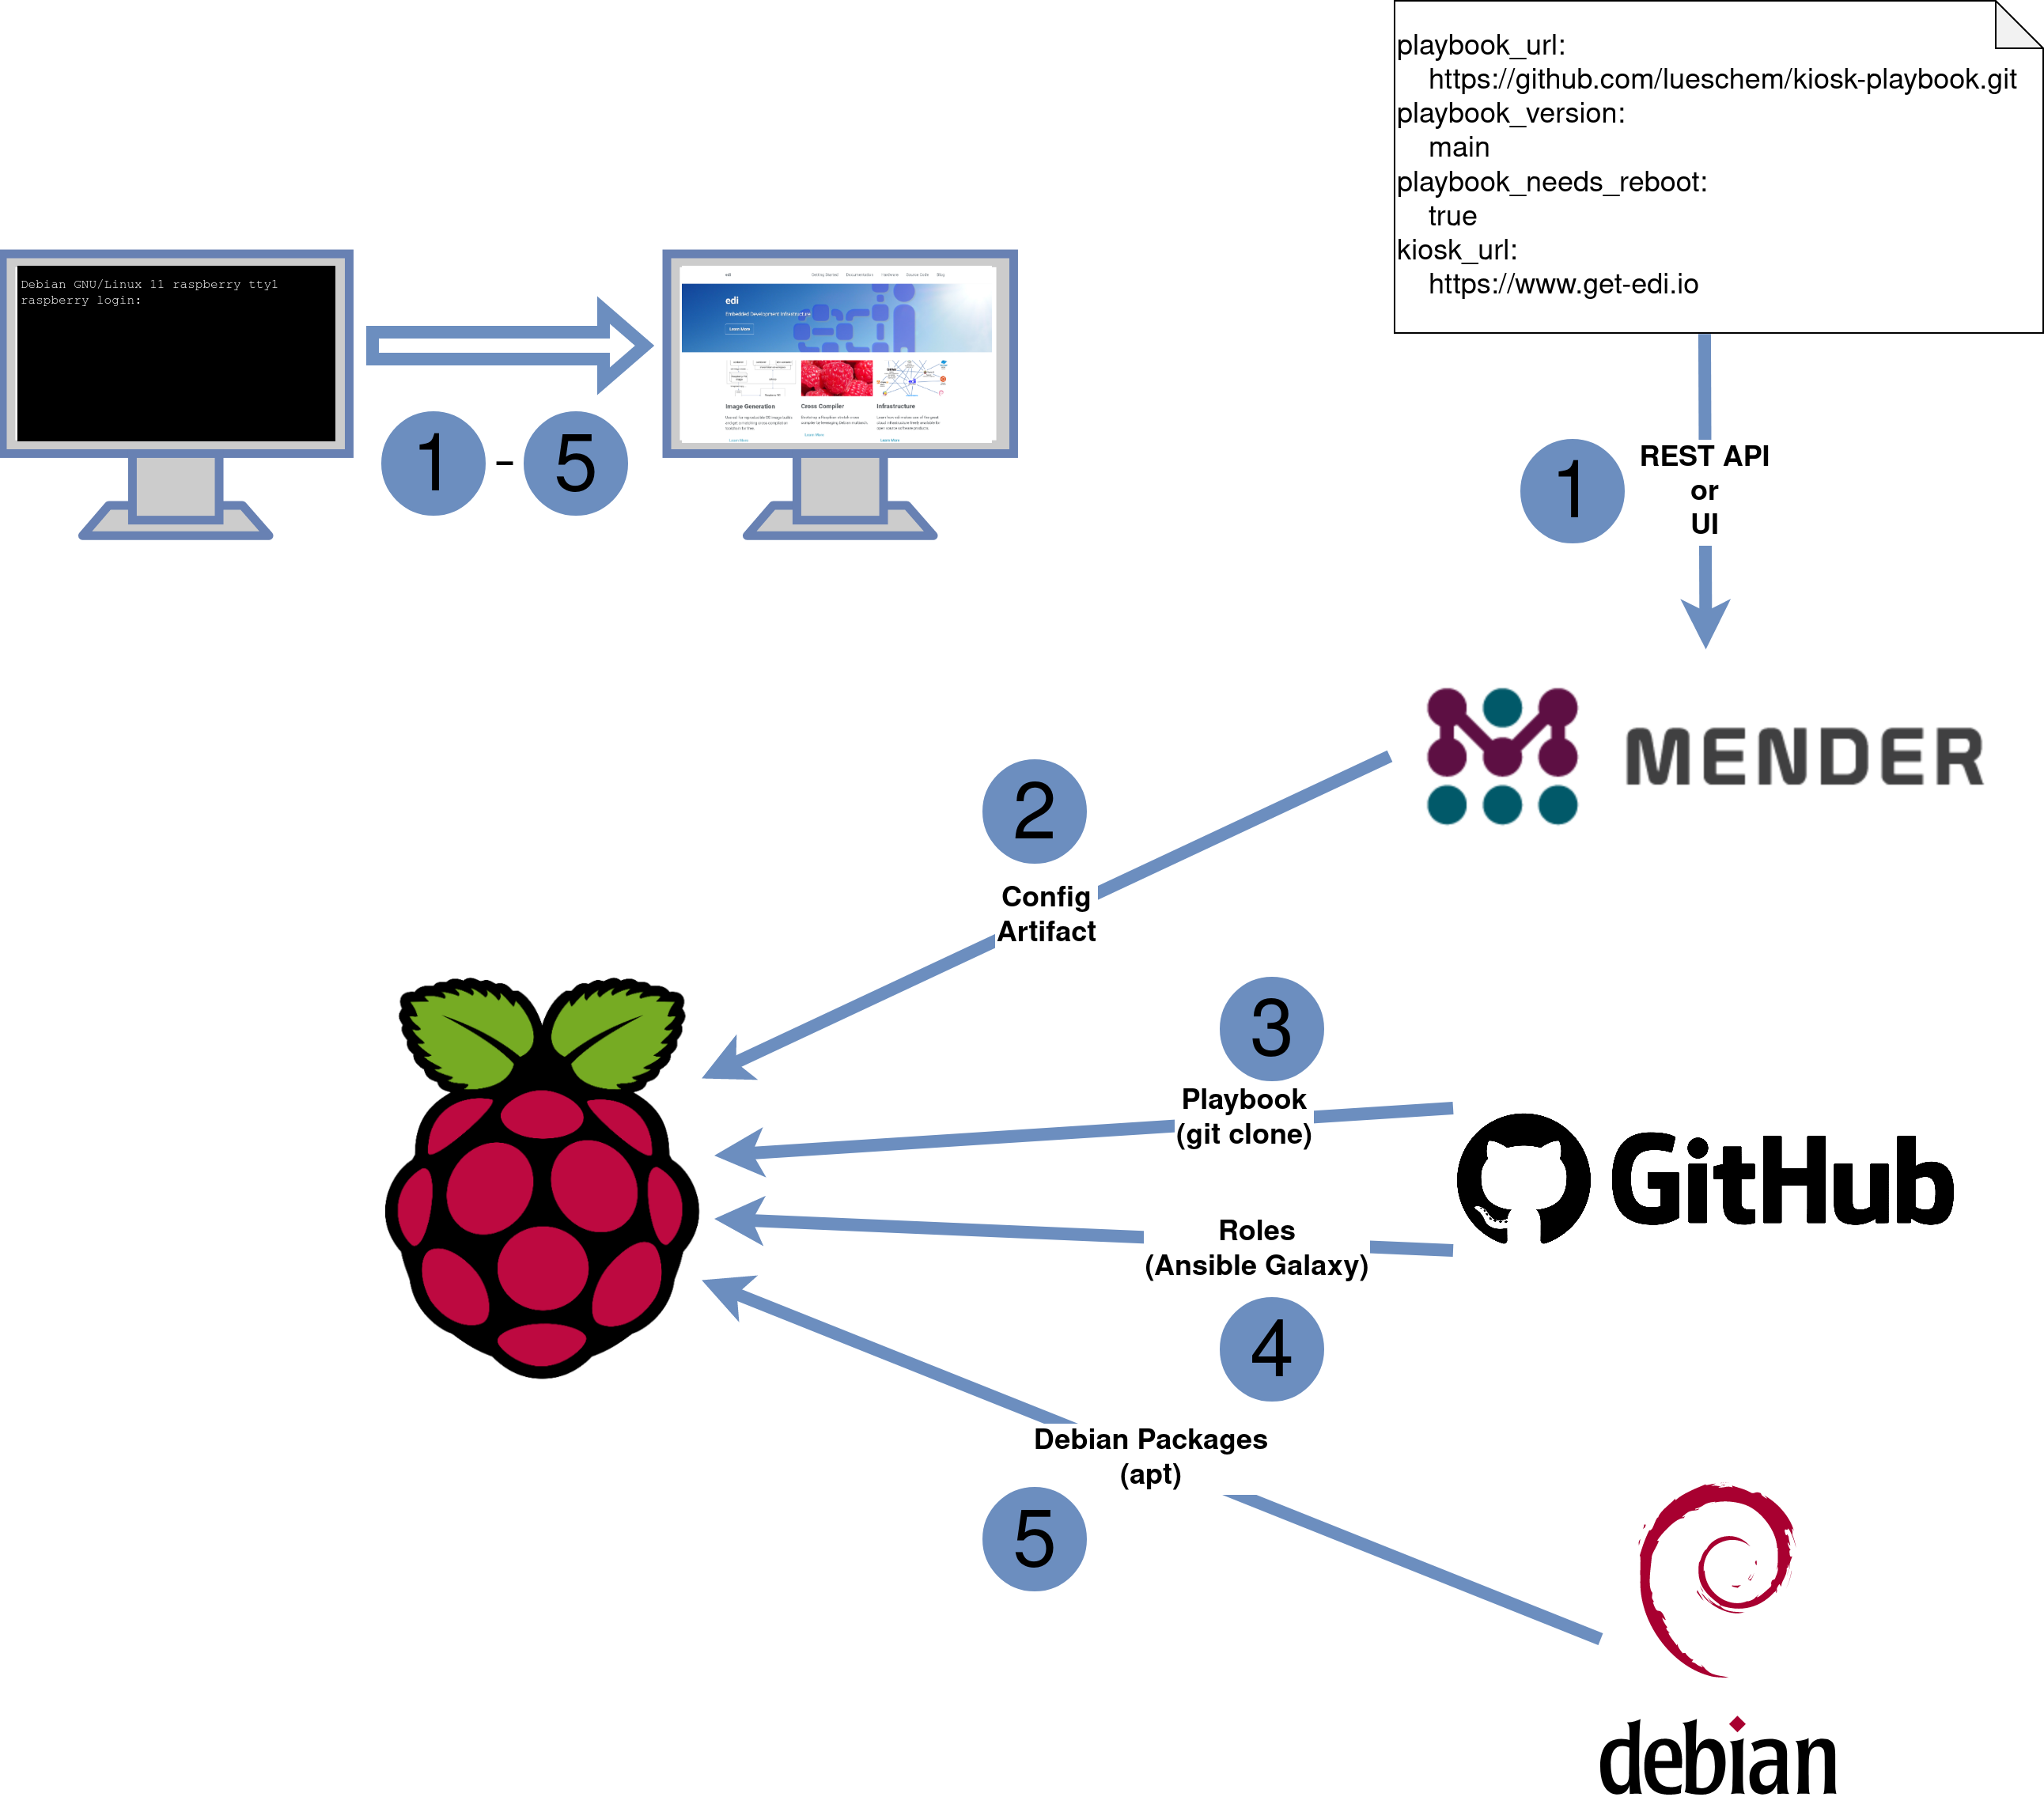
Mender (Step 1+2)
Using Mender we send the per device parameters to the IoT device:
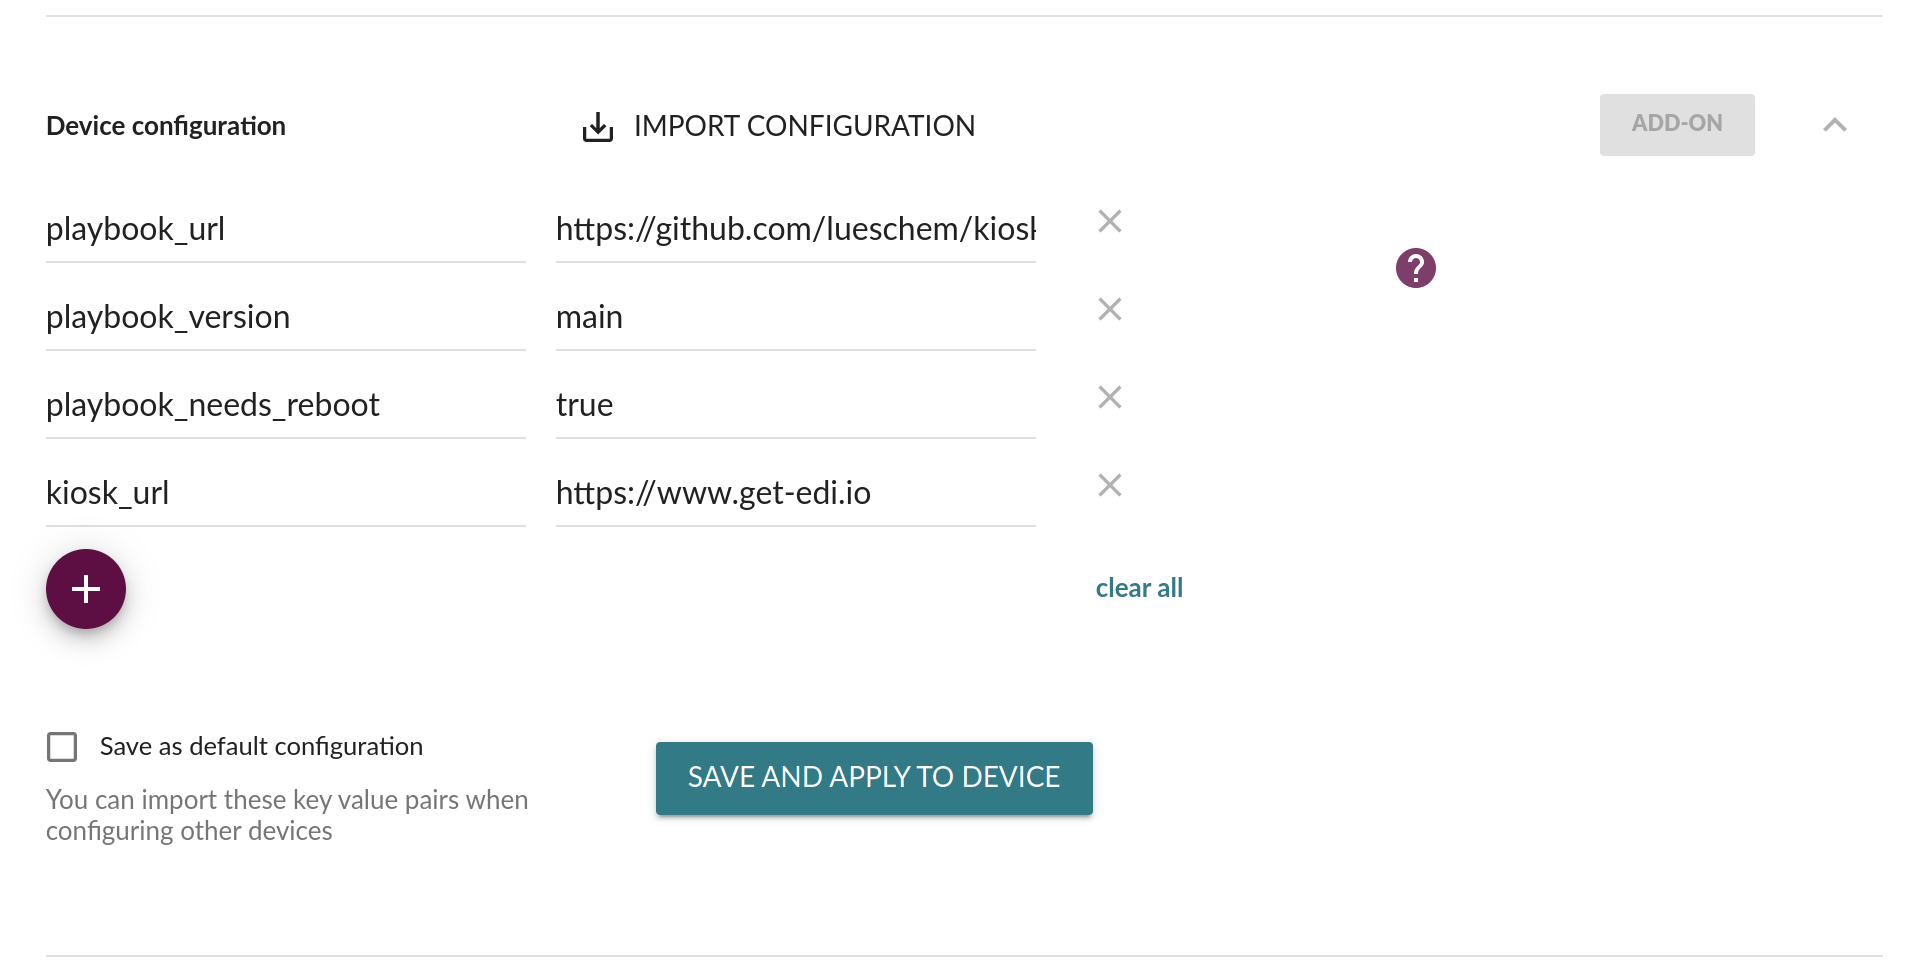
playbook_url: The Ansible playbook we would like to execute on the device. The playbook itself does not contain device specific data and can be reused on other devices that shall also be turned into a kiosk terminal.playbook_version: The git branch, tag or hash of the playbook that shall be used. Prior to merging modifications tomaina development branch can be tested on a test device.playbook_needs_reboot: This tells the device to reboot after the playbook has been applied.kiosk_url: The web page that shall be displayed full screen on the kiosk terminal.
This is all - when hitting the “SAVE AND APPLY TO DEVICE” button this data gets transferred to the device as a json file wrapped into a Mender artifact. On a bigger fleet you would of course not enter the above values manually but rather use the REST API instead.
git (Step 3)
When Mender applies the configuration
to the device it calls hook scripts in a .d folder. Our hook script looks like this:
#!/bin/bash

...

CONFIG="$1"

...

if ! PLAYBOOK_URL="$(jq -r -e .playbook_url < "${CONFIG}")"
then
    echo "${0}: Nothing to do as there is no 'playbook_url'."
    exit 0
fi

if ! PLAYBOOK_VERSION="$(jq -r -e .playbook_version < "${CONFIG}")"
then
    echo "${0}: Nothing to do as there is no 'playbook_version'."
    exit 0
fi

...

${GITOPS_USER} git clone --branch "${PLAYBOOK_VERSION}" --depth 1 "${PLAYBOOK_URL}" playbook

...

if [ -e requirements.yml ]
then
    ${GITOPS_USER} ansible-galaxy install --roles-path "${ROLES_PATH}" -r requirements.yml
fi

${GITOPS_USER} ansible-playbook --connection=local --inventory 127.0.0.1, playbook.yml --extra-vars "@${CONFIG_FILE}"

...
Git is being used as the (almost) single source of truth. Every change on the playbook can be properly
tracked and a well-defined setup of the permissions of the git branches allows you to enforce quality
gates before the modifications get rolled out to the entire fleet. git by design scales up to large fleets
and by using https to clone we make sure that we are not blocked by a typical firewall.
With the help of git the above hook script clones the playbook
that we configured on Mender. Within the same repository there is a requirements.yml file that
specifies the roles that the playbook depends upon:
- src: https://github.com/lueschem/ansible-kiosk.git
  version: master
In our case ansible-galaxy will pull the role ansible-kiosk which is actually a role that I cloned from Pawel Krupa (slight modifications were needed to make it work on Debian instead of Raspberry Pi OS). Behind the scenes ansible-galaxy is obviously also interacting with git.
Ansible (Step 4+5)
Now that the Ansible playbook and all the roles (here it is just one role) are present on the device,
the command ansible-playbook gets used to apply the playbook
---
- hosts: all

  roles:
    - role: ansible-kiosk
      become: true
      become_user: root
on the device itself.
The role ansible-kiosk will then install the required packages such as xserver-xorg, openbox
and chromium, configure systemd, autologin and openbox. Thanks to
apt the device knows exactly which packages to install
including the required dependencies.
As the playbook is getting executed locally there are no ssh related issues as written
here.
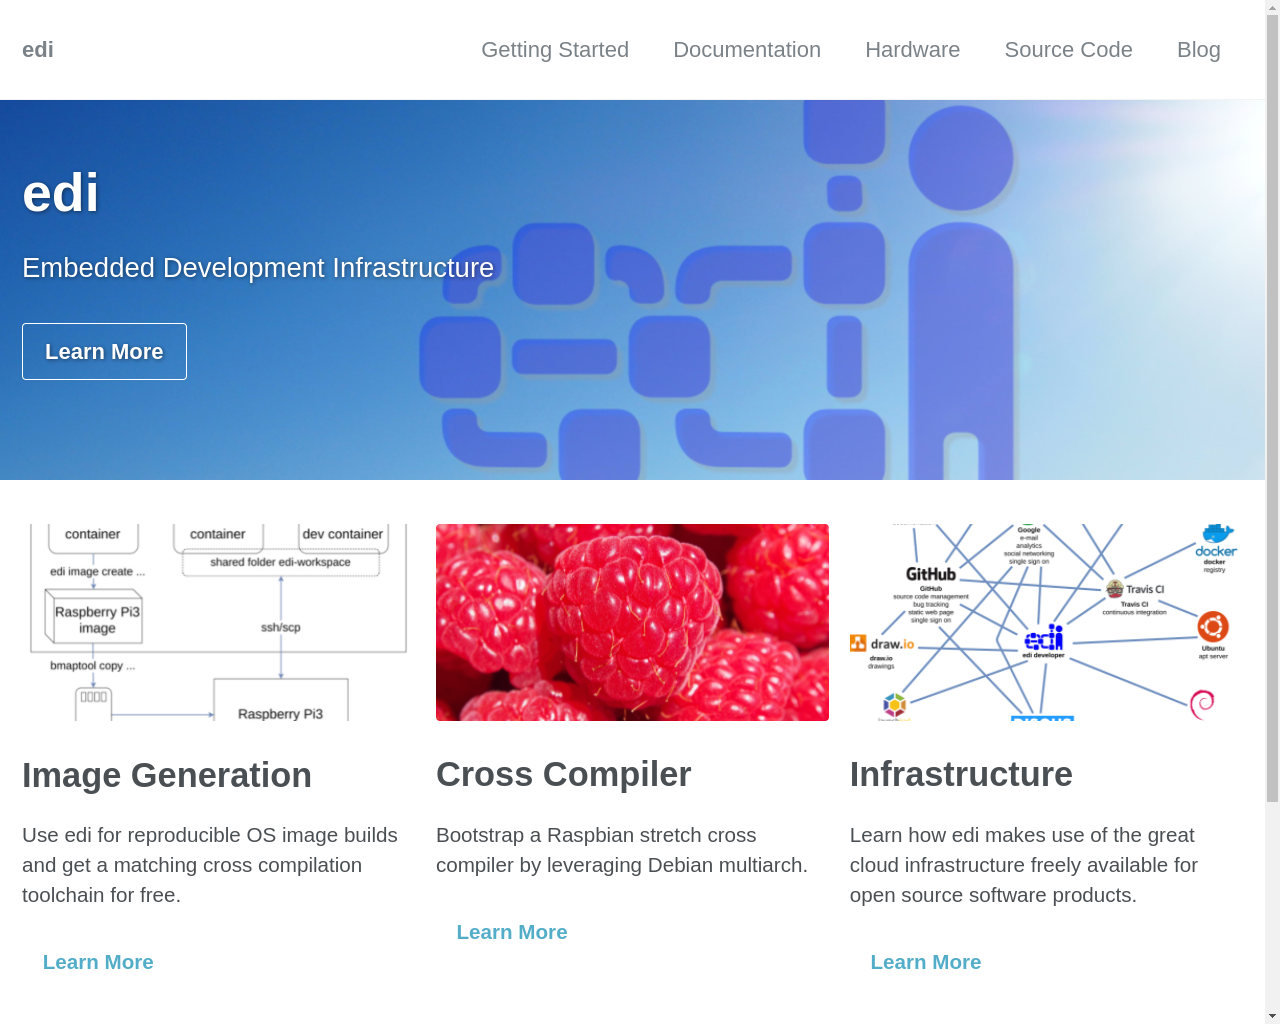
Verification
Of course, you would now like to check (from remote) that the kiosk terminal is showing the right page (e.g. using a remote terminal):
pi@raspberry:~$ sudo apt install scrot
...
pi@raspberry:~$ scrot -D :0 screenshot.png
And indeed - this is what the Raspberry Pi displays on the attached screen:
Conclusion
The above example shows how easy a headless Raspberry Pi 4 got transformed into a kiosk terminal. Needless to say that the kiosk terminal was just an example and that the same headless Raspberry Pi 4 could be transformed into something else by just modifying the parameters given in step 1. The backend setup is lightweight, scalable, and it reuses powerful tools that are already familiar to the developers.
At the moment the minimal headless Raspberry Pi 4 update image preloaded with git and Ansible is about 235 MB big. Without Ansible and git preloaded the image will be about 100 MB smaller. Alone the refactoring of upcoming Ansible and pycryptodome releases will help to significantly shrink the size of the update image again.
If you would like to try out this GitOps ready setup right now then clone the
edi-pi repository to get started (the image build command is
sudo edi -v image create pi4-bullseye-arm64-gitops.yml).
Leave a comment