Building and Testing OS Images with GitHub Actions
In this blog post I present a game changer for the future development of edi based project configurations (such as edi-pi, edi-var and edi-cl). The following two items will help me - and hopefully others - a lot to further improve the quality of edi and its project configurations:
- A fully automated setup of a self-hosted GitHub actions runner that is capable of running edi commands.
- A GitHub actions workflow that builds a Debian based OS from scratch, dispatches it to a device and tests it.
Self-hosted Runner
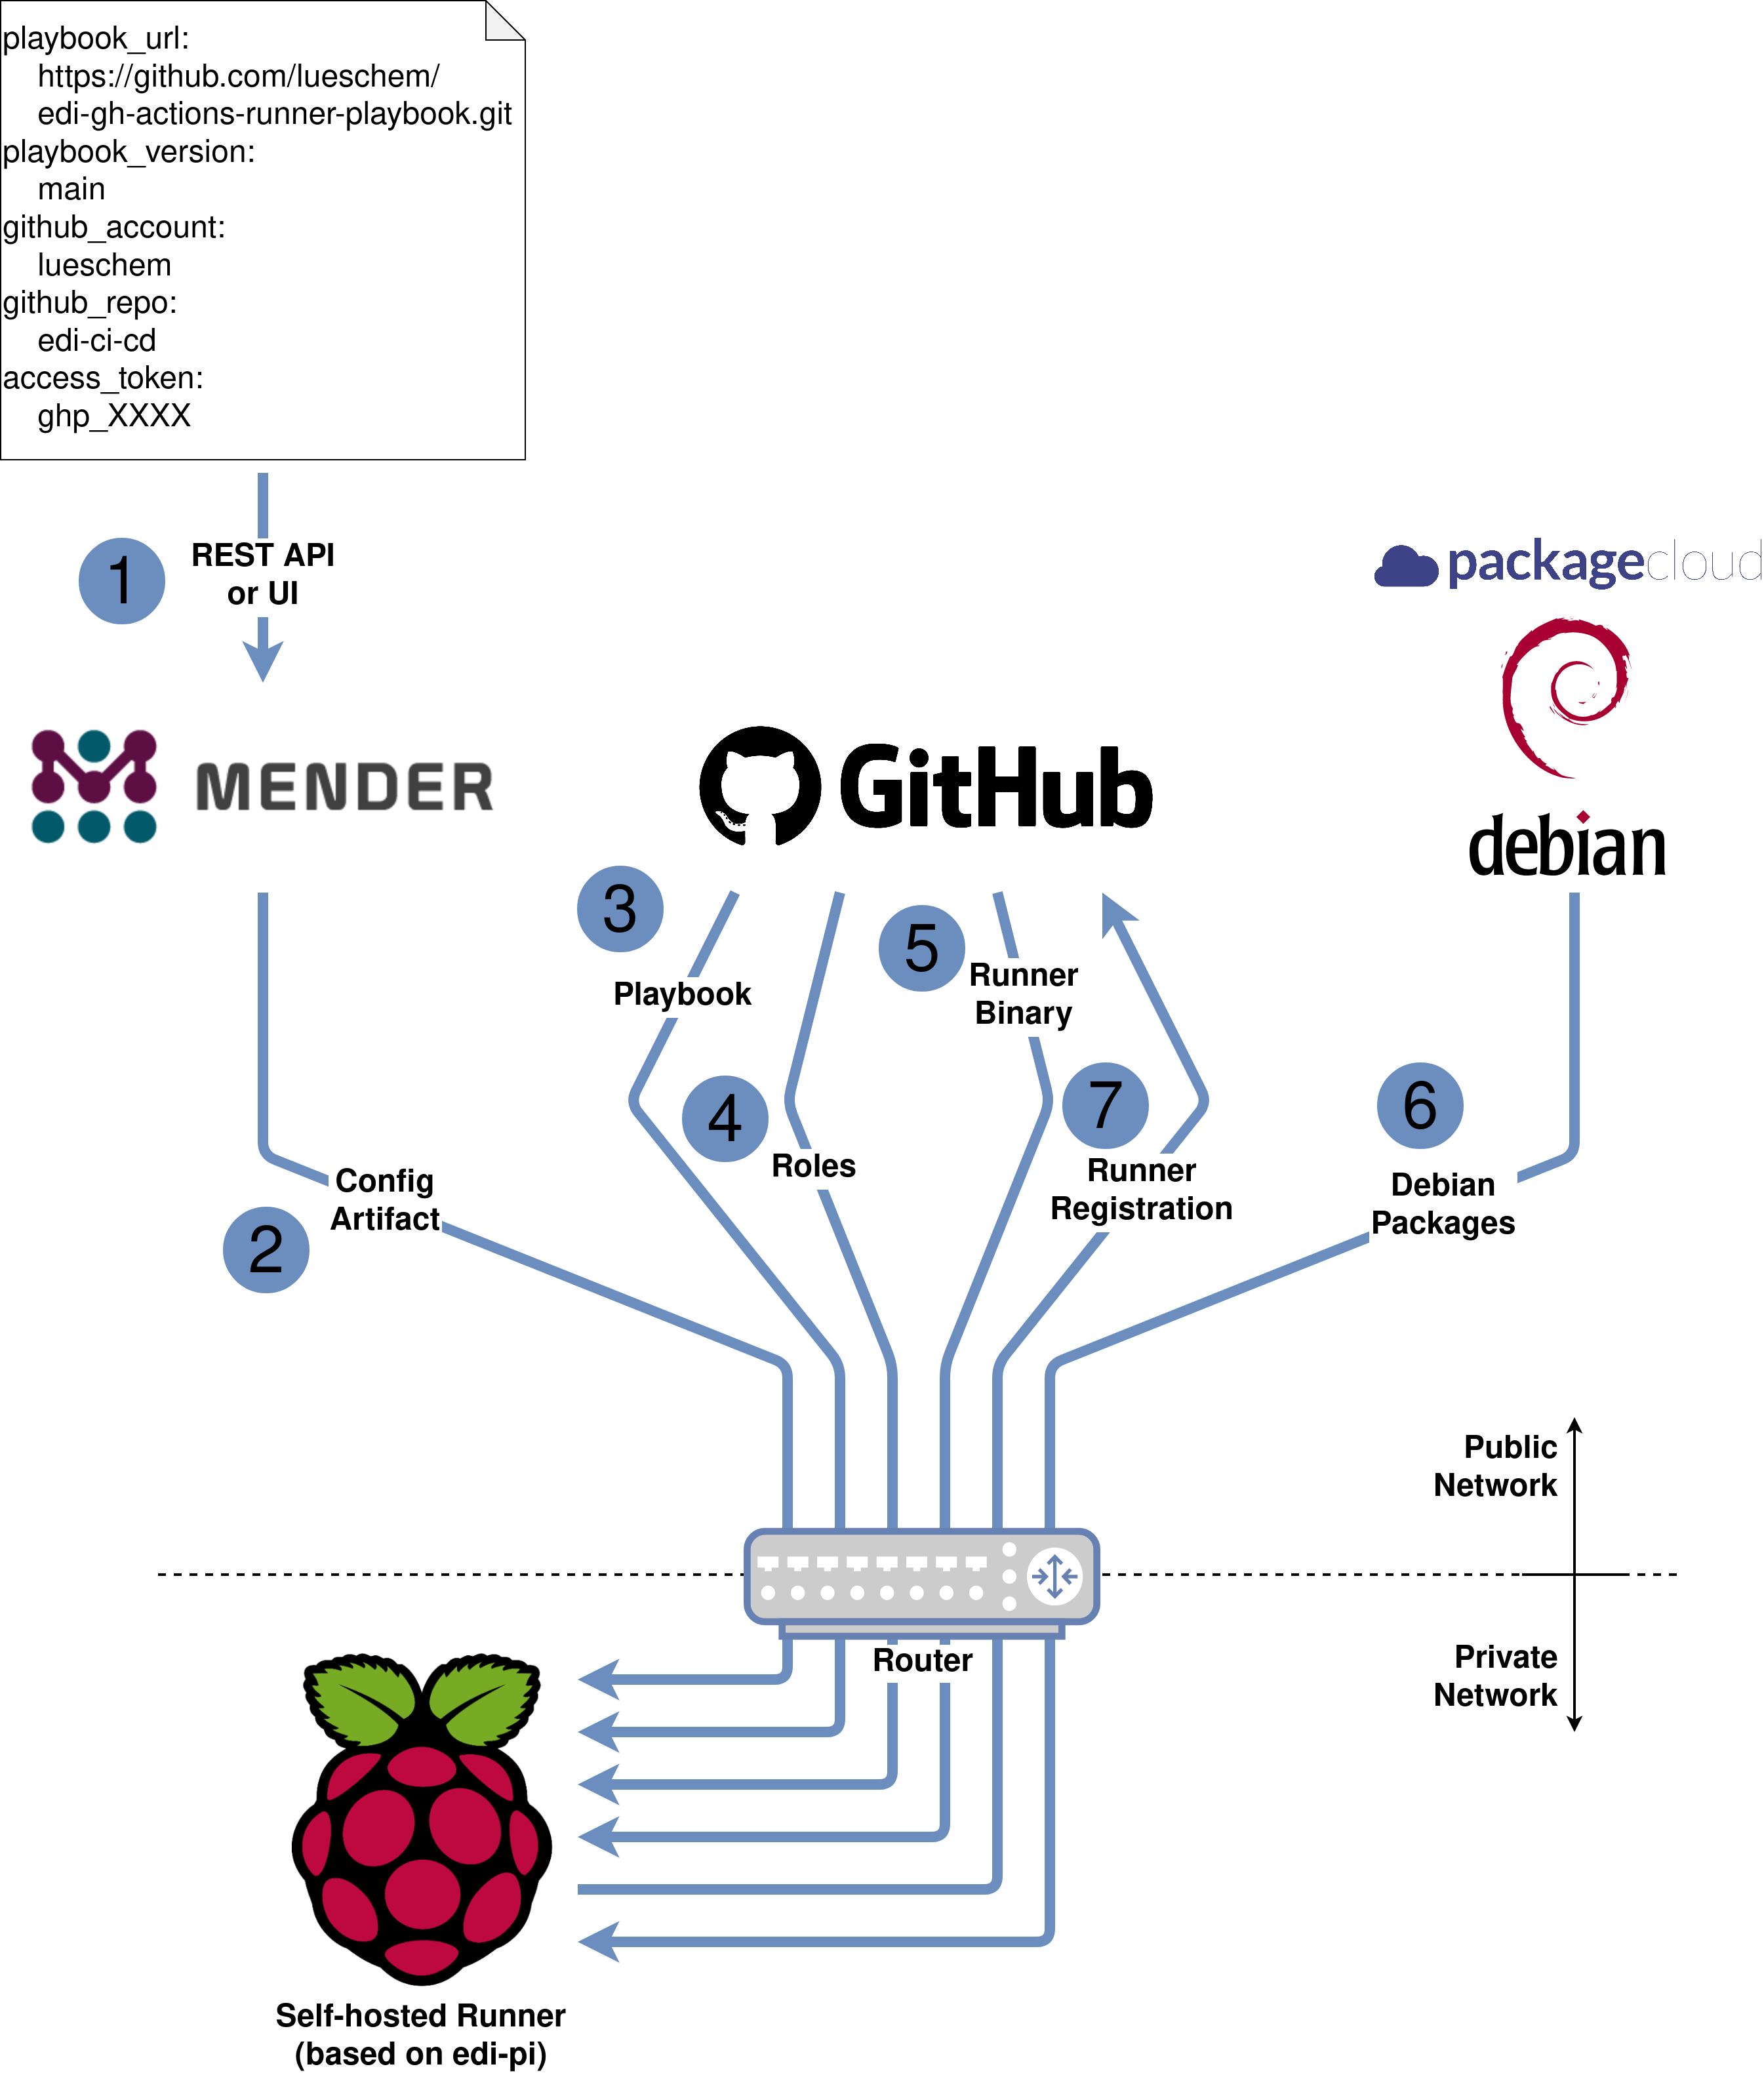
The following sketch depicts the setup of the self-hosted runner:
As a prerequisite a GitOps ready Raspberry Pi 4 got flashed
(see edi-pi, command sudo edi -v image create pi4-bullseye-arm64-gitops.yml).
However, this time we do not turn the Raspberry Pi into a kiosk terminal.
Instead, we choose to go with a different configuration and enter the following key/value pairs using the
Mender configure add on (step ①):
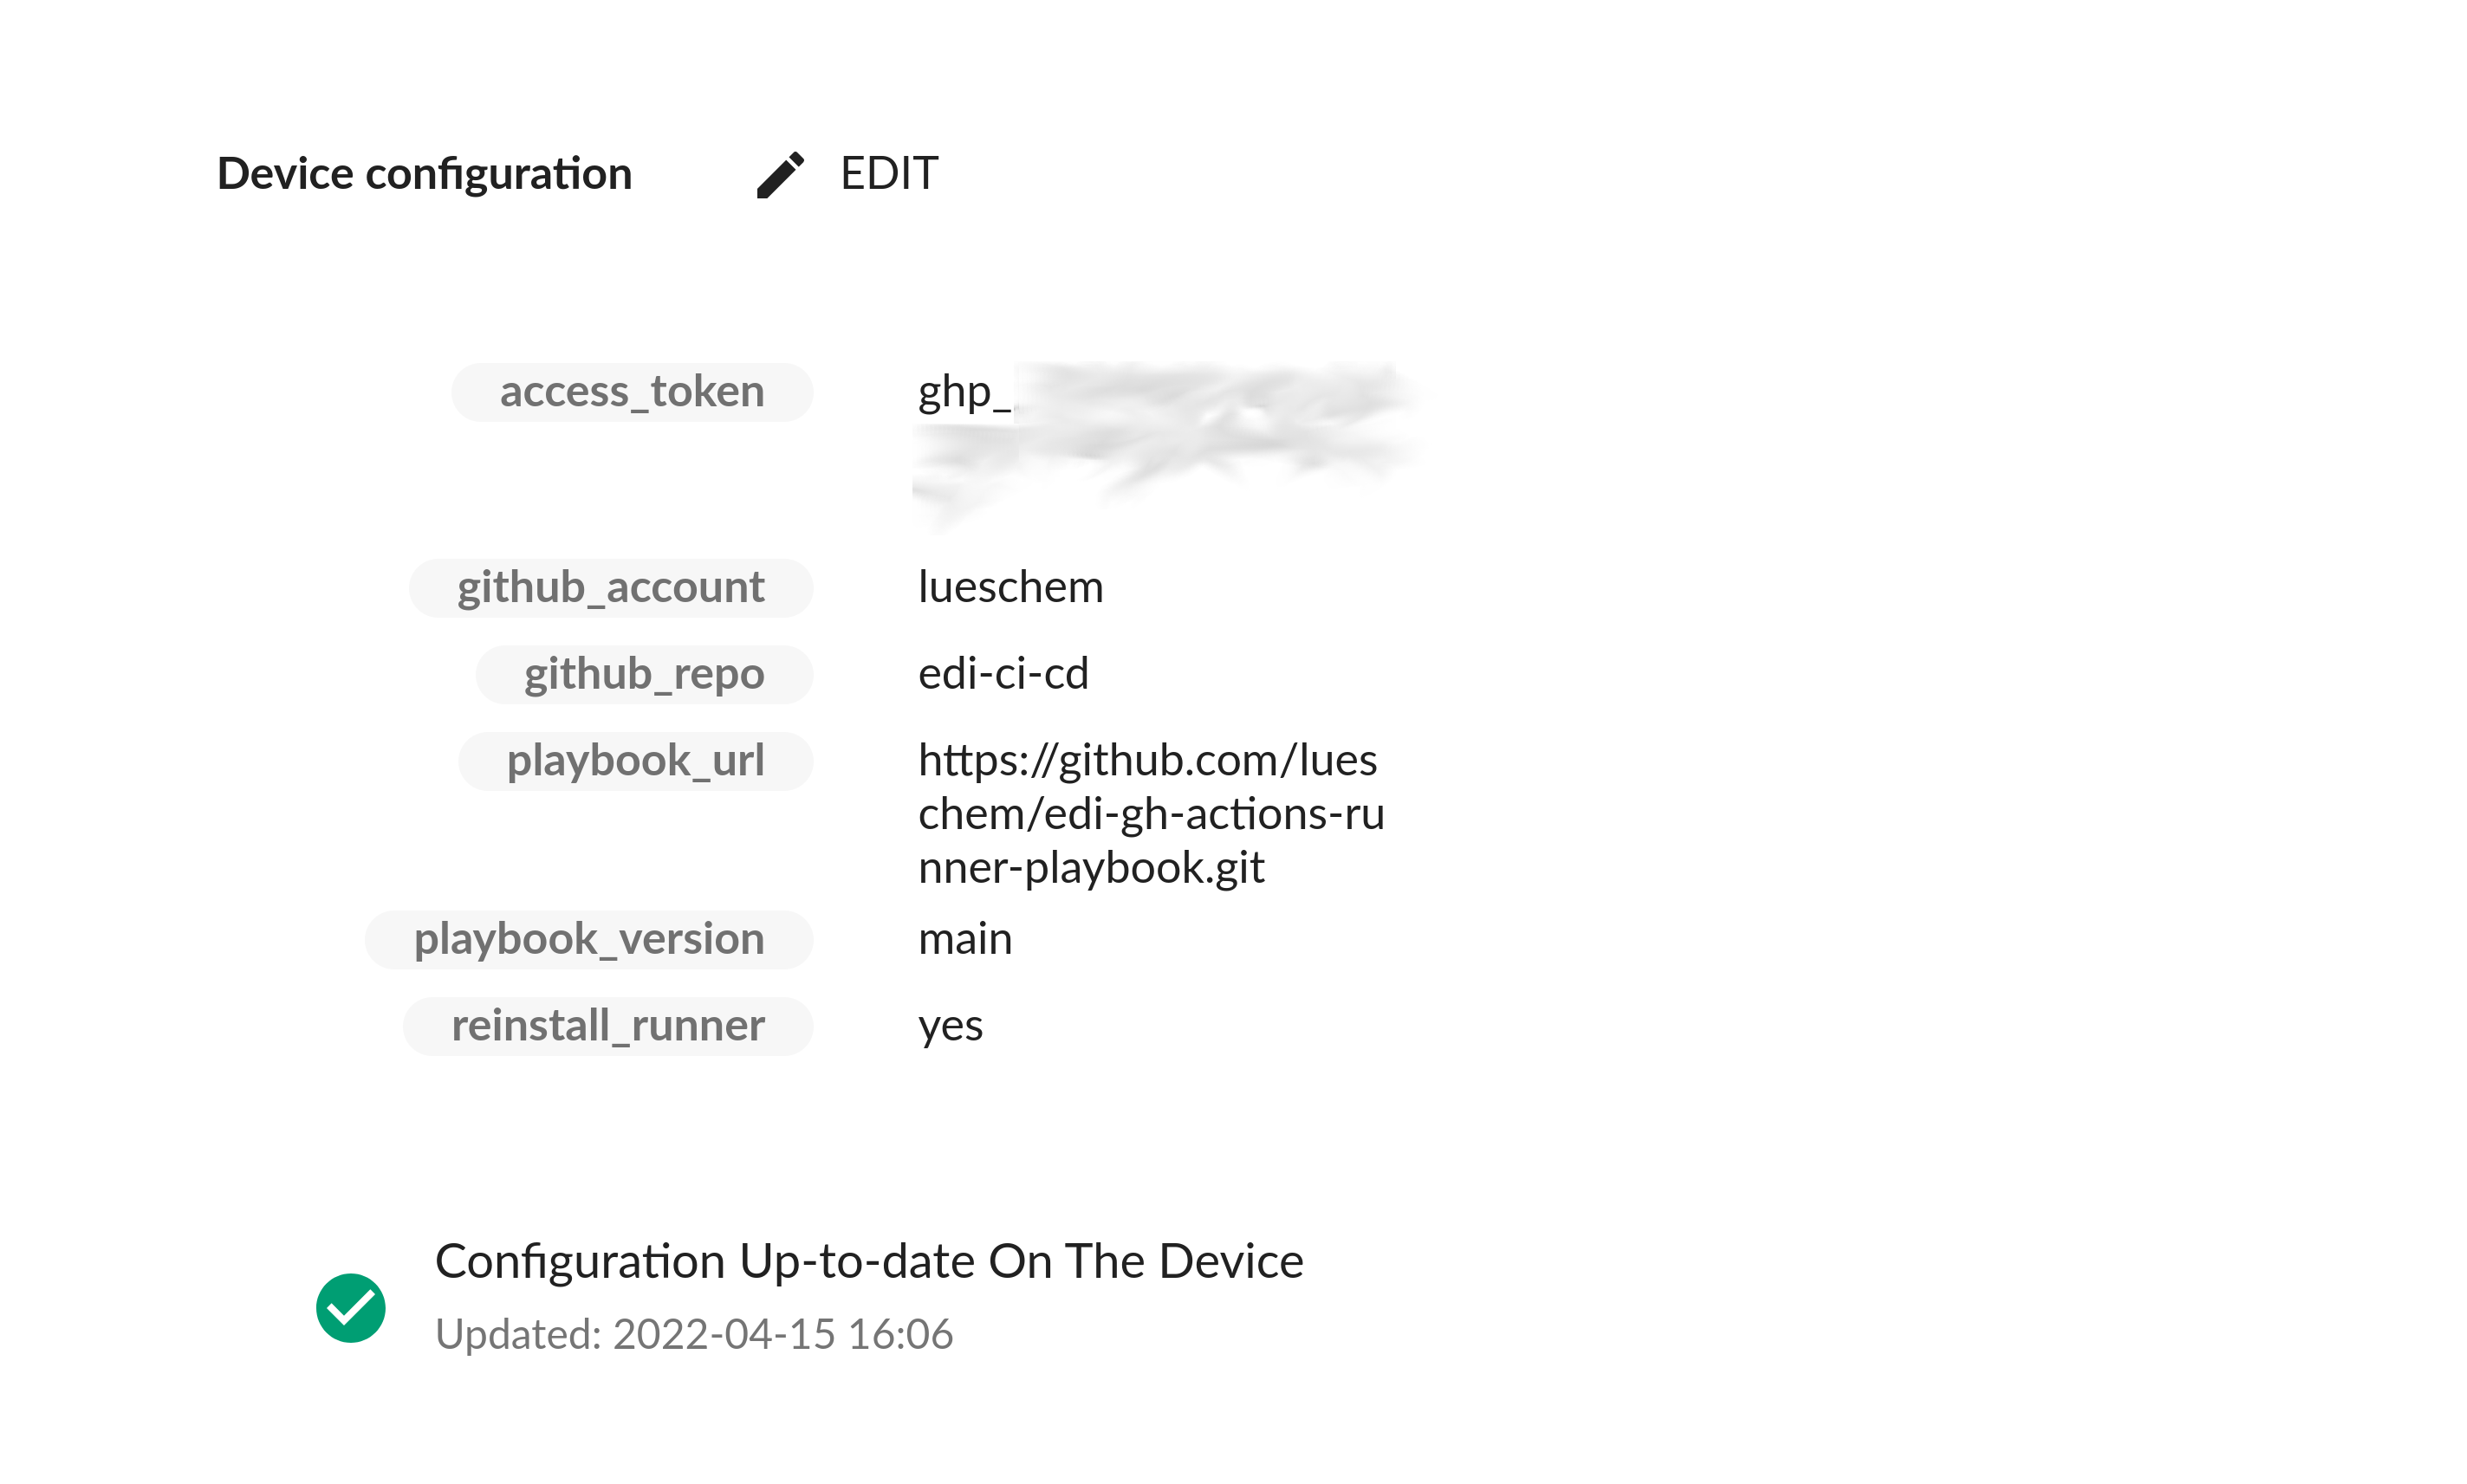
Accordingly - after receiving the config artifact ② - the device will clone the playbook edi-gh-actions-runner-playbook ③ (main branch). The playbook itself makes use of two roles ④:
- github_actions_runner: A role written by Michal Muransky that installs a GitHub Actions runner.
- edi_installer: A role that installs edi including its prerequisites.
The roles will then fetch the runner binaries from GitHub ⑤ and a lot of Debian packages from the upstream Debian repositories and the edi PackageCloud repository ⑥.
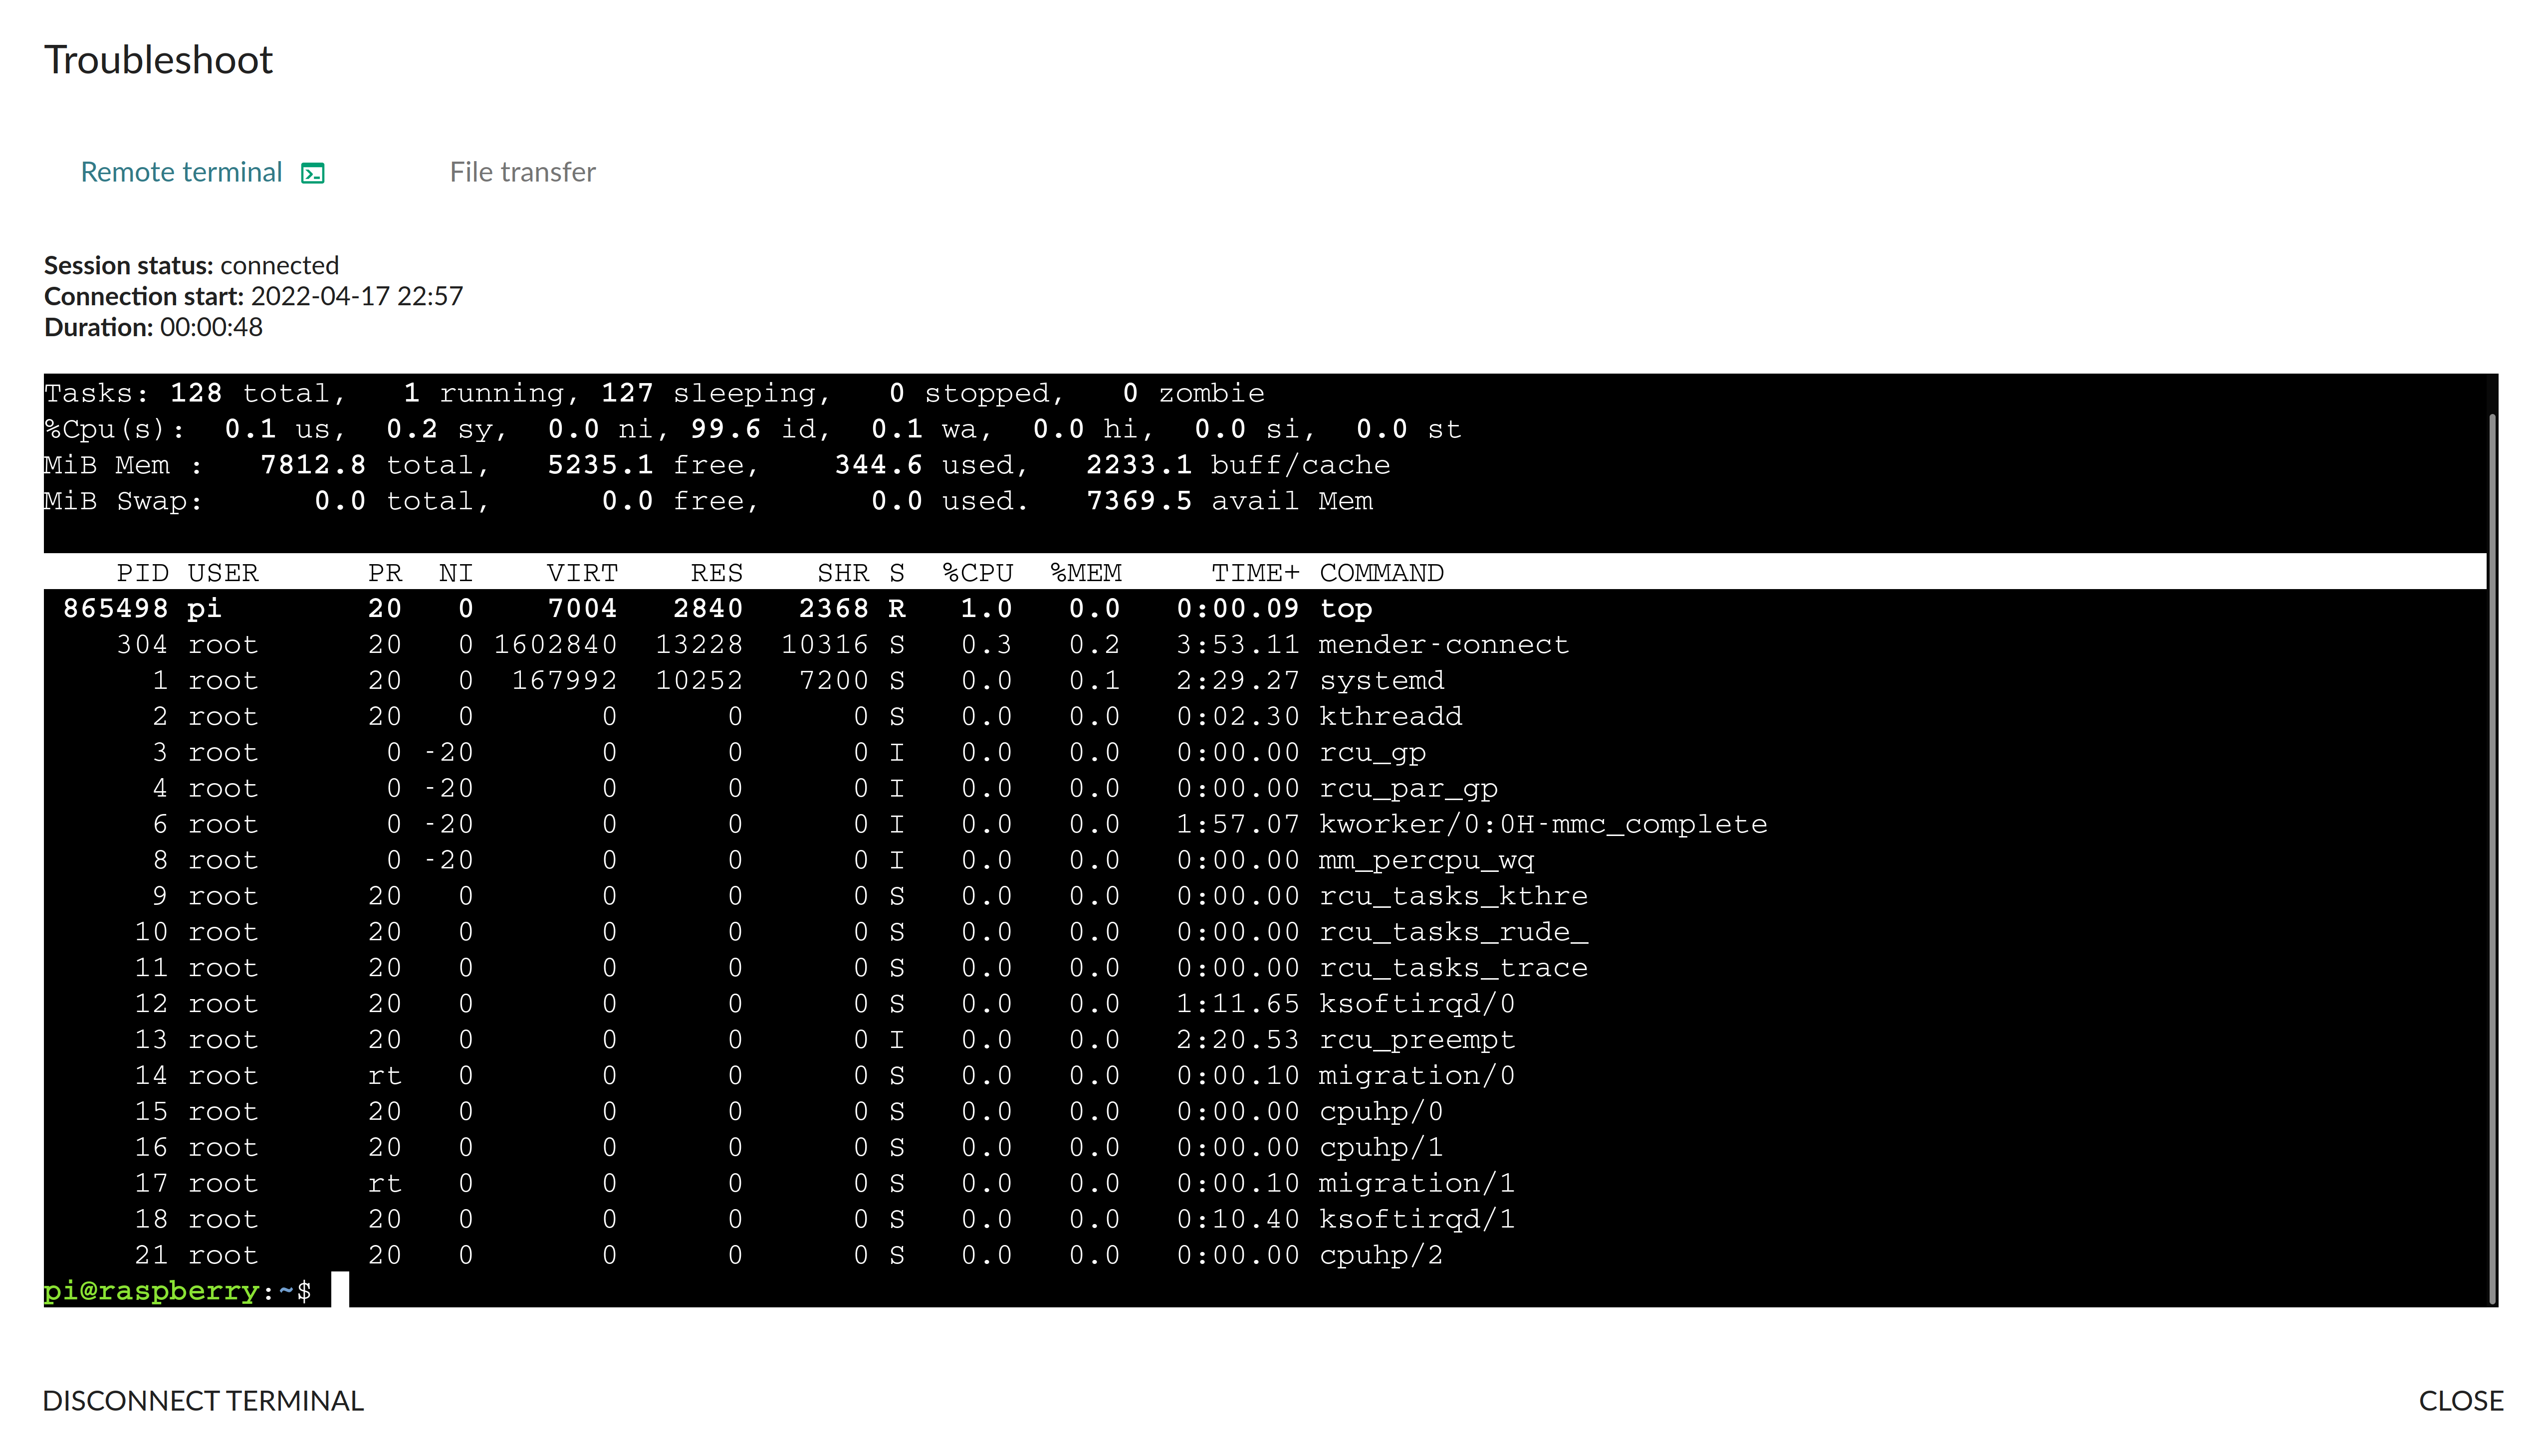
If something should go wrong, then the Mender remote terminal add-on might be useful:
However - once everything is properly setup - nothing should go wrong anymore and the self-hosted runner will connect to the edi-ci GitHub repository:

Please note that the edi-ci project is a private repository according to the GitHub security recommendation. In order to still make the setup transparent, I provide the cloned repository edi-ci-public.
As a bonus even a complete OS update on the runner is possible and the whole setup will get re-applied thanks to this commit.
OS Build and Test Workflow
Using the self-hosted runner we are now able to trigger our OS build, dispatch and test workflow:
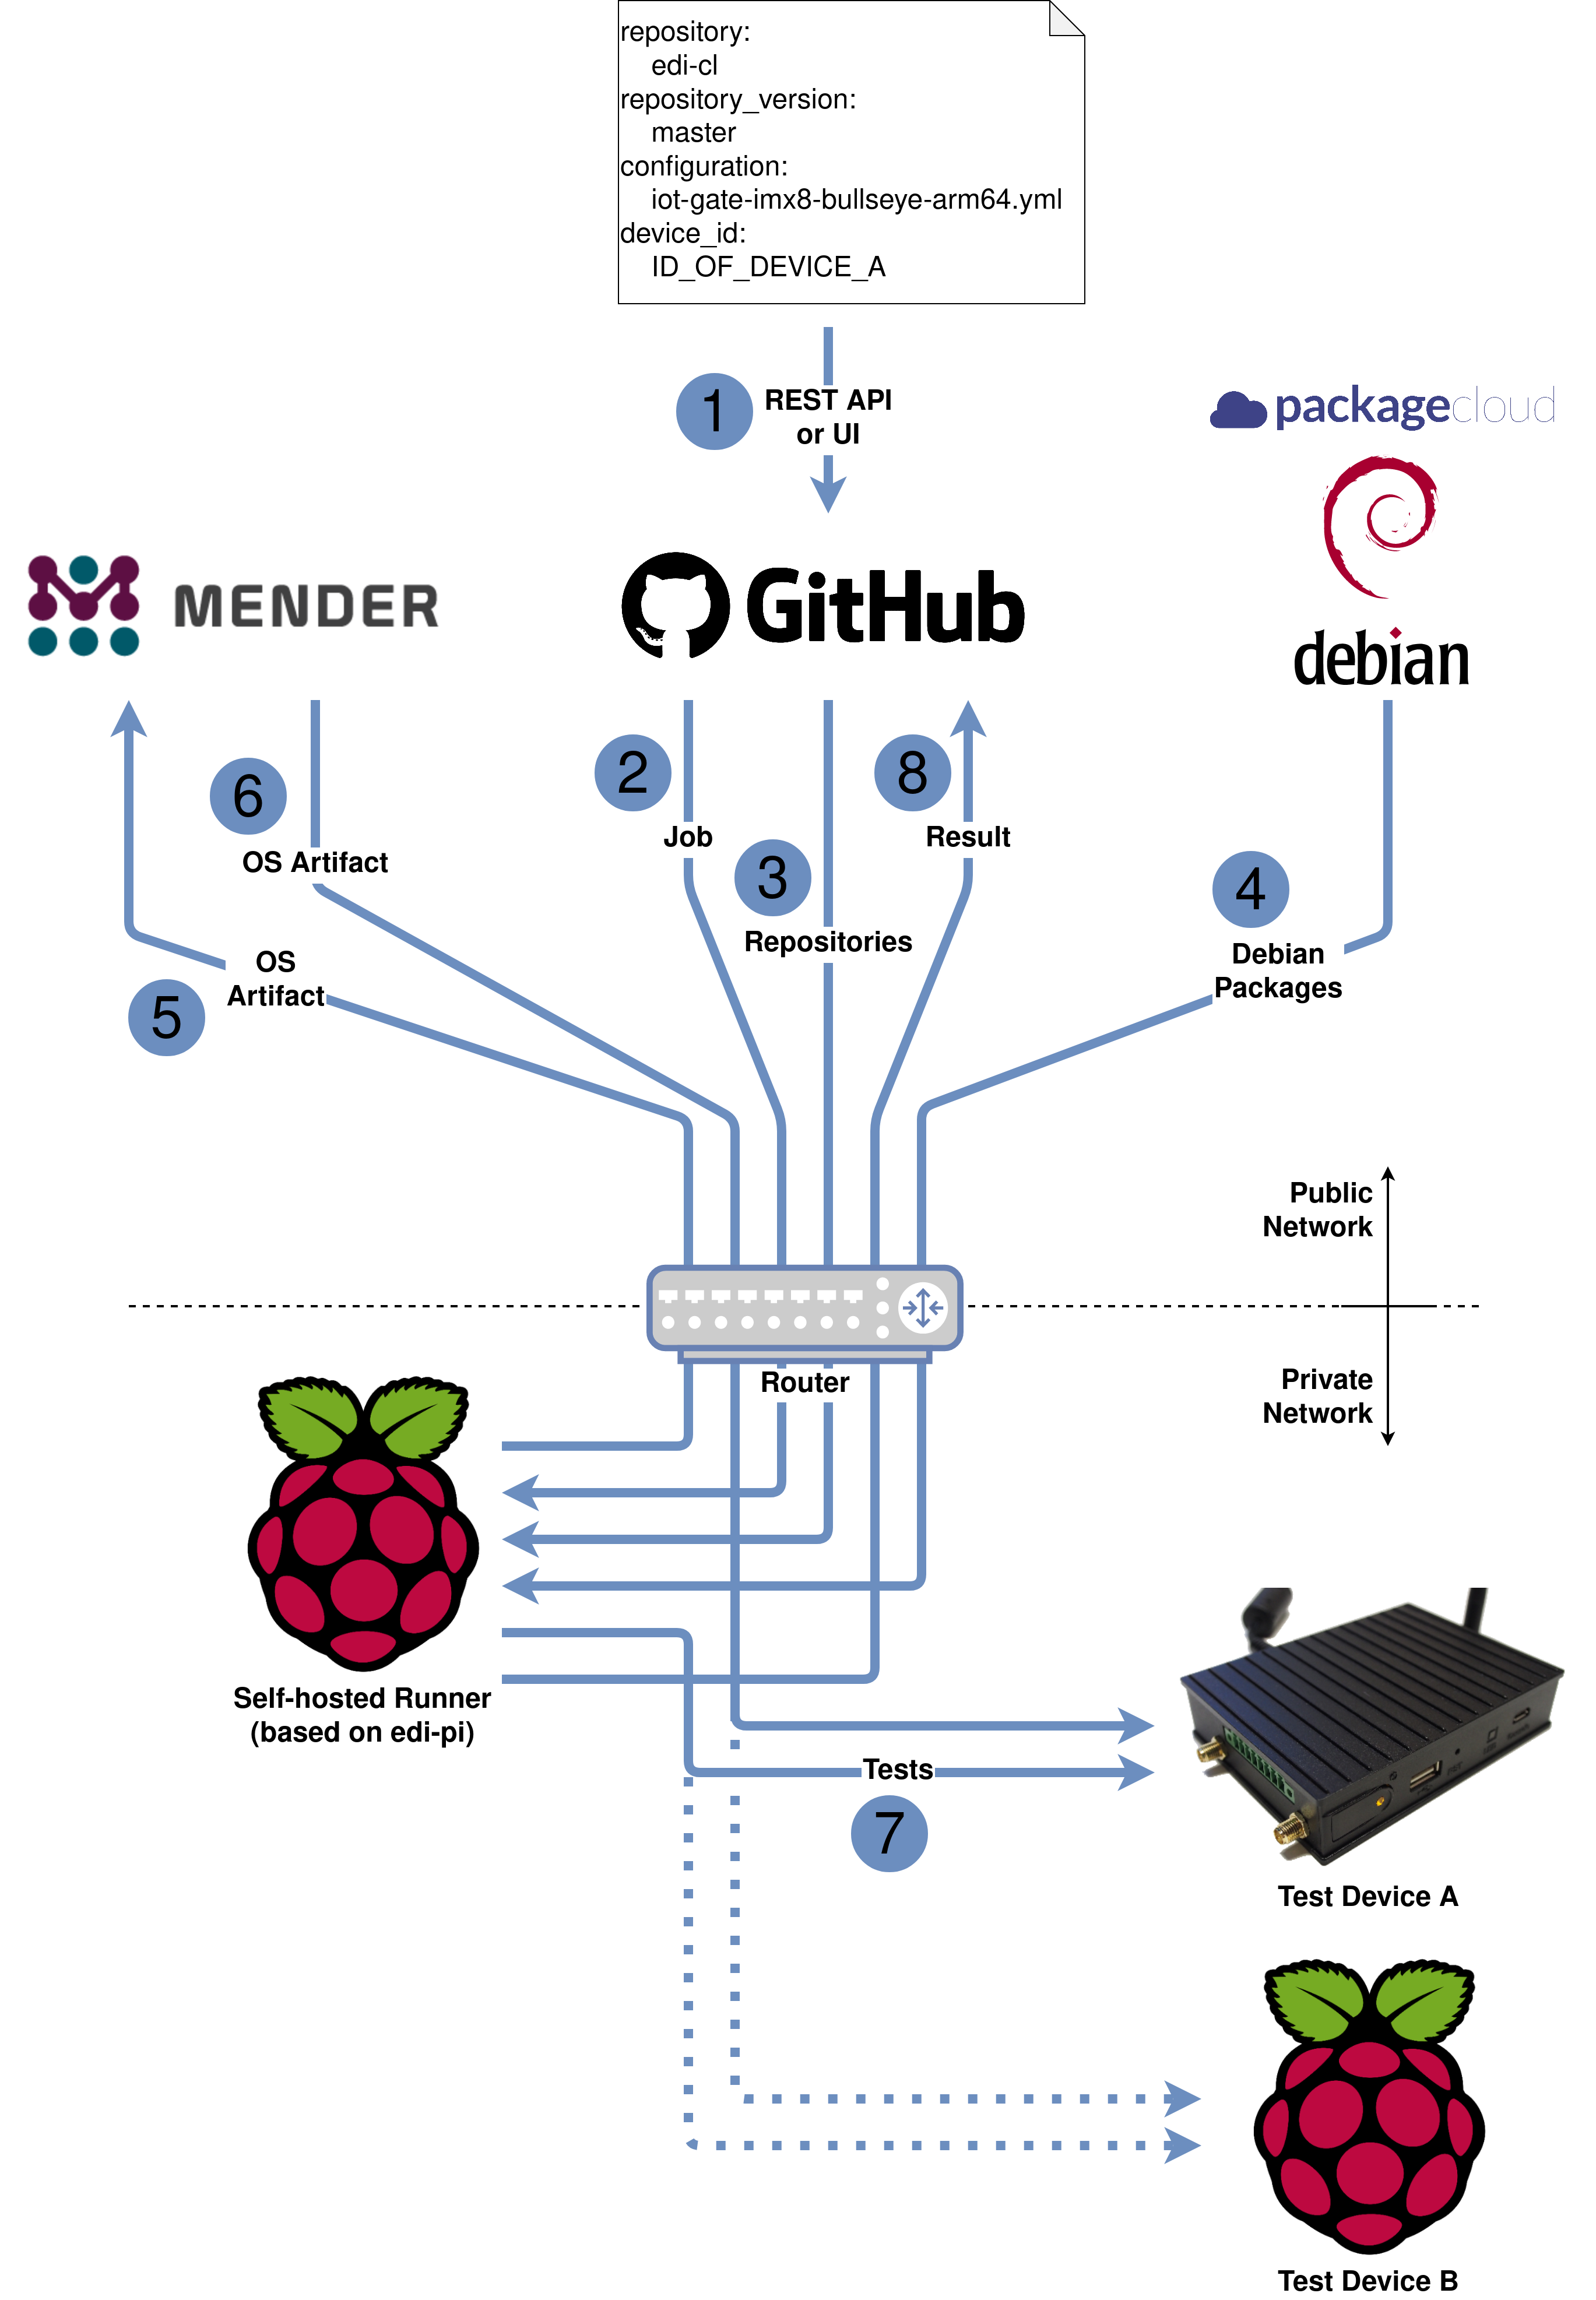
As a first step (the only manual step) we tell the workflow which configuration (here iot-gate-imx8-bullseye-arm64.yml)
of which repository (here edi-cl using the main branch) shall be applied to our chosen device (referenced by the
Mender device id) ①:
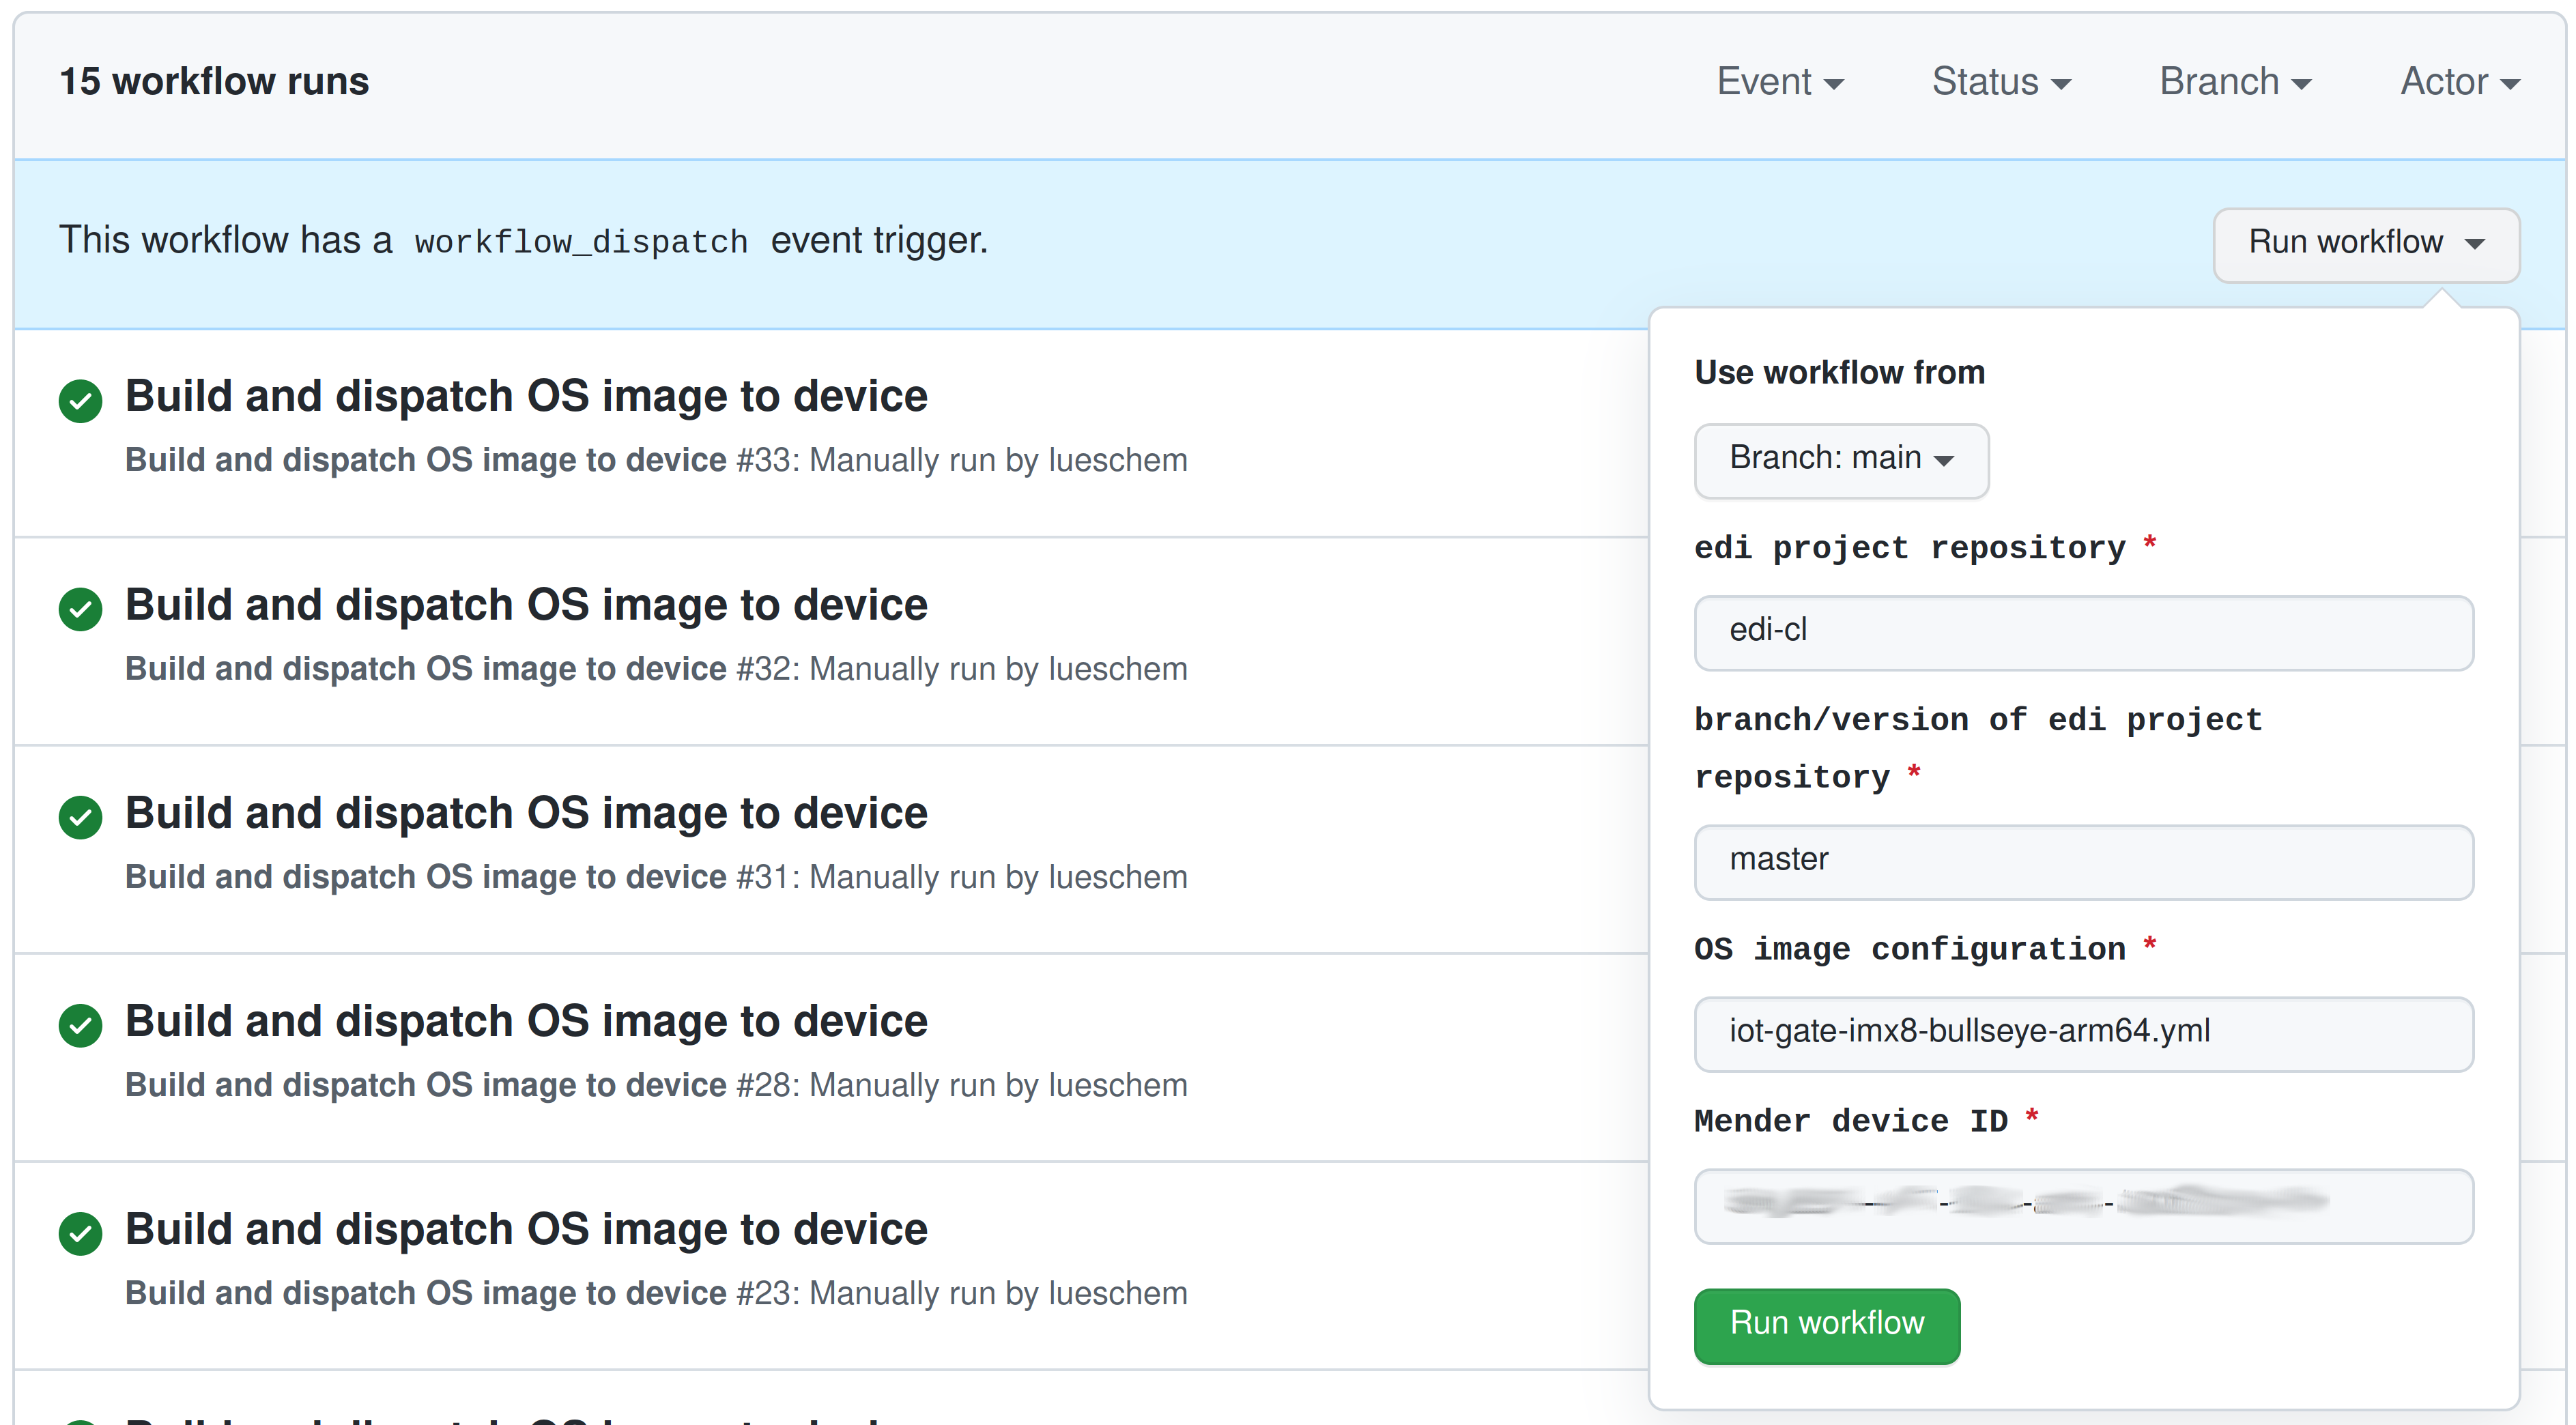
The job will then be sent to our self-hosted runner ②. The runner will check out the source code of edi-ci and
the specified edi project configuration (here edi-cl) ③. edi will then take
care of building the specified OS artifact (here iot-gate-imx8-bullseye-arm64.yml) from scratch. During this
process a lot of Debian packages will get fetched from various Debian repositories ④. Using the
Mender REST API the resulting Mender OS artifact
will get uploaded to Mender ⑤ and then dispatched to our chosen device ⑥.
After our test device got successfully updated, we run some tests that are based on pytest and Testinfra ⑦.
Testinfra is a pretty powerful pytest plugin and - as an example - the following test makes sure that all systemd services are running properly on our test device:
def test_systemd_overall_status(host):
    cmd = host.run("systemctl is-system-running")
    assert cmd.rc == 0
    assert "running" in cmd.stdout
Another test checks that our root device got properly resized and comes with the expected mount points:
import re
import pytest


def test_root_device(host):
    cmd = host.run("df / --output=pcent")
    assert cmd.rc == 0
    match = re.search(r"(\d{1,3})%", cmd.stdout)
    assert match
    # if the usage is below 50% then the root device got properly resized
    assert int(match.group(1)) < 50


def test_resize_completion(host):
    assert host.file("/etc/edi-resize-rootfs.done").exists


@pytest.mark.parametrize("mountpoint", ["/", "/data", "/boot/firmware", ])
def test_mountpoints(host, mountpoint):
    assert host.mount_point(mountpoint).exists
The result of the whole workflow gets nicely presented on GitHub ⑧:
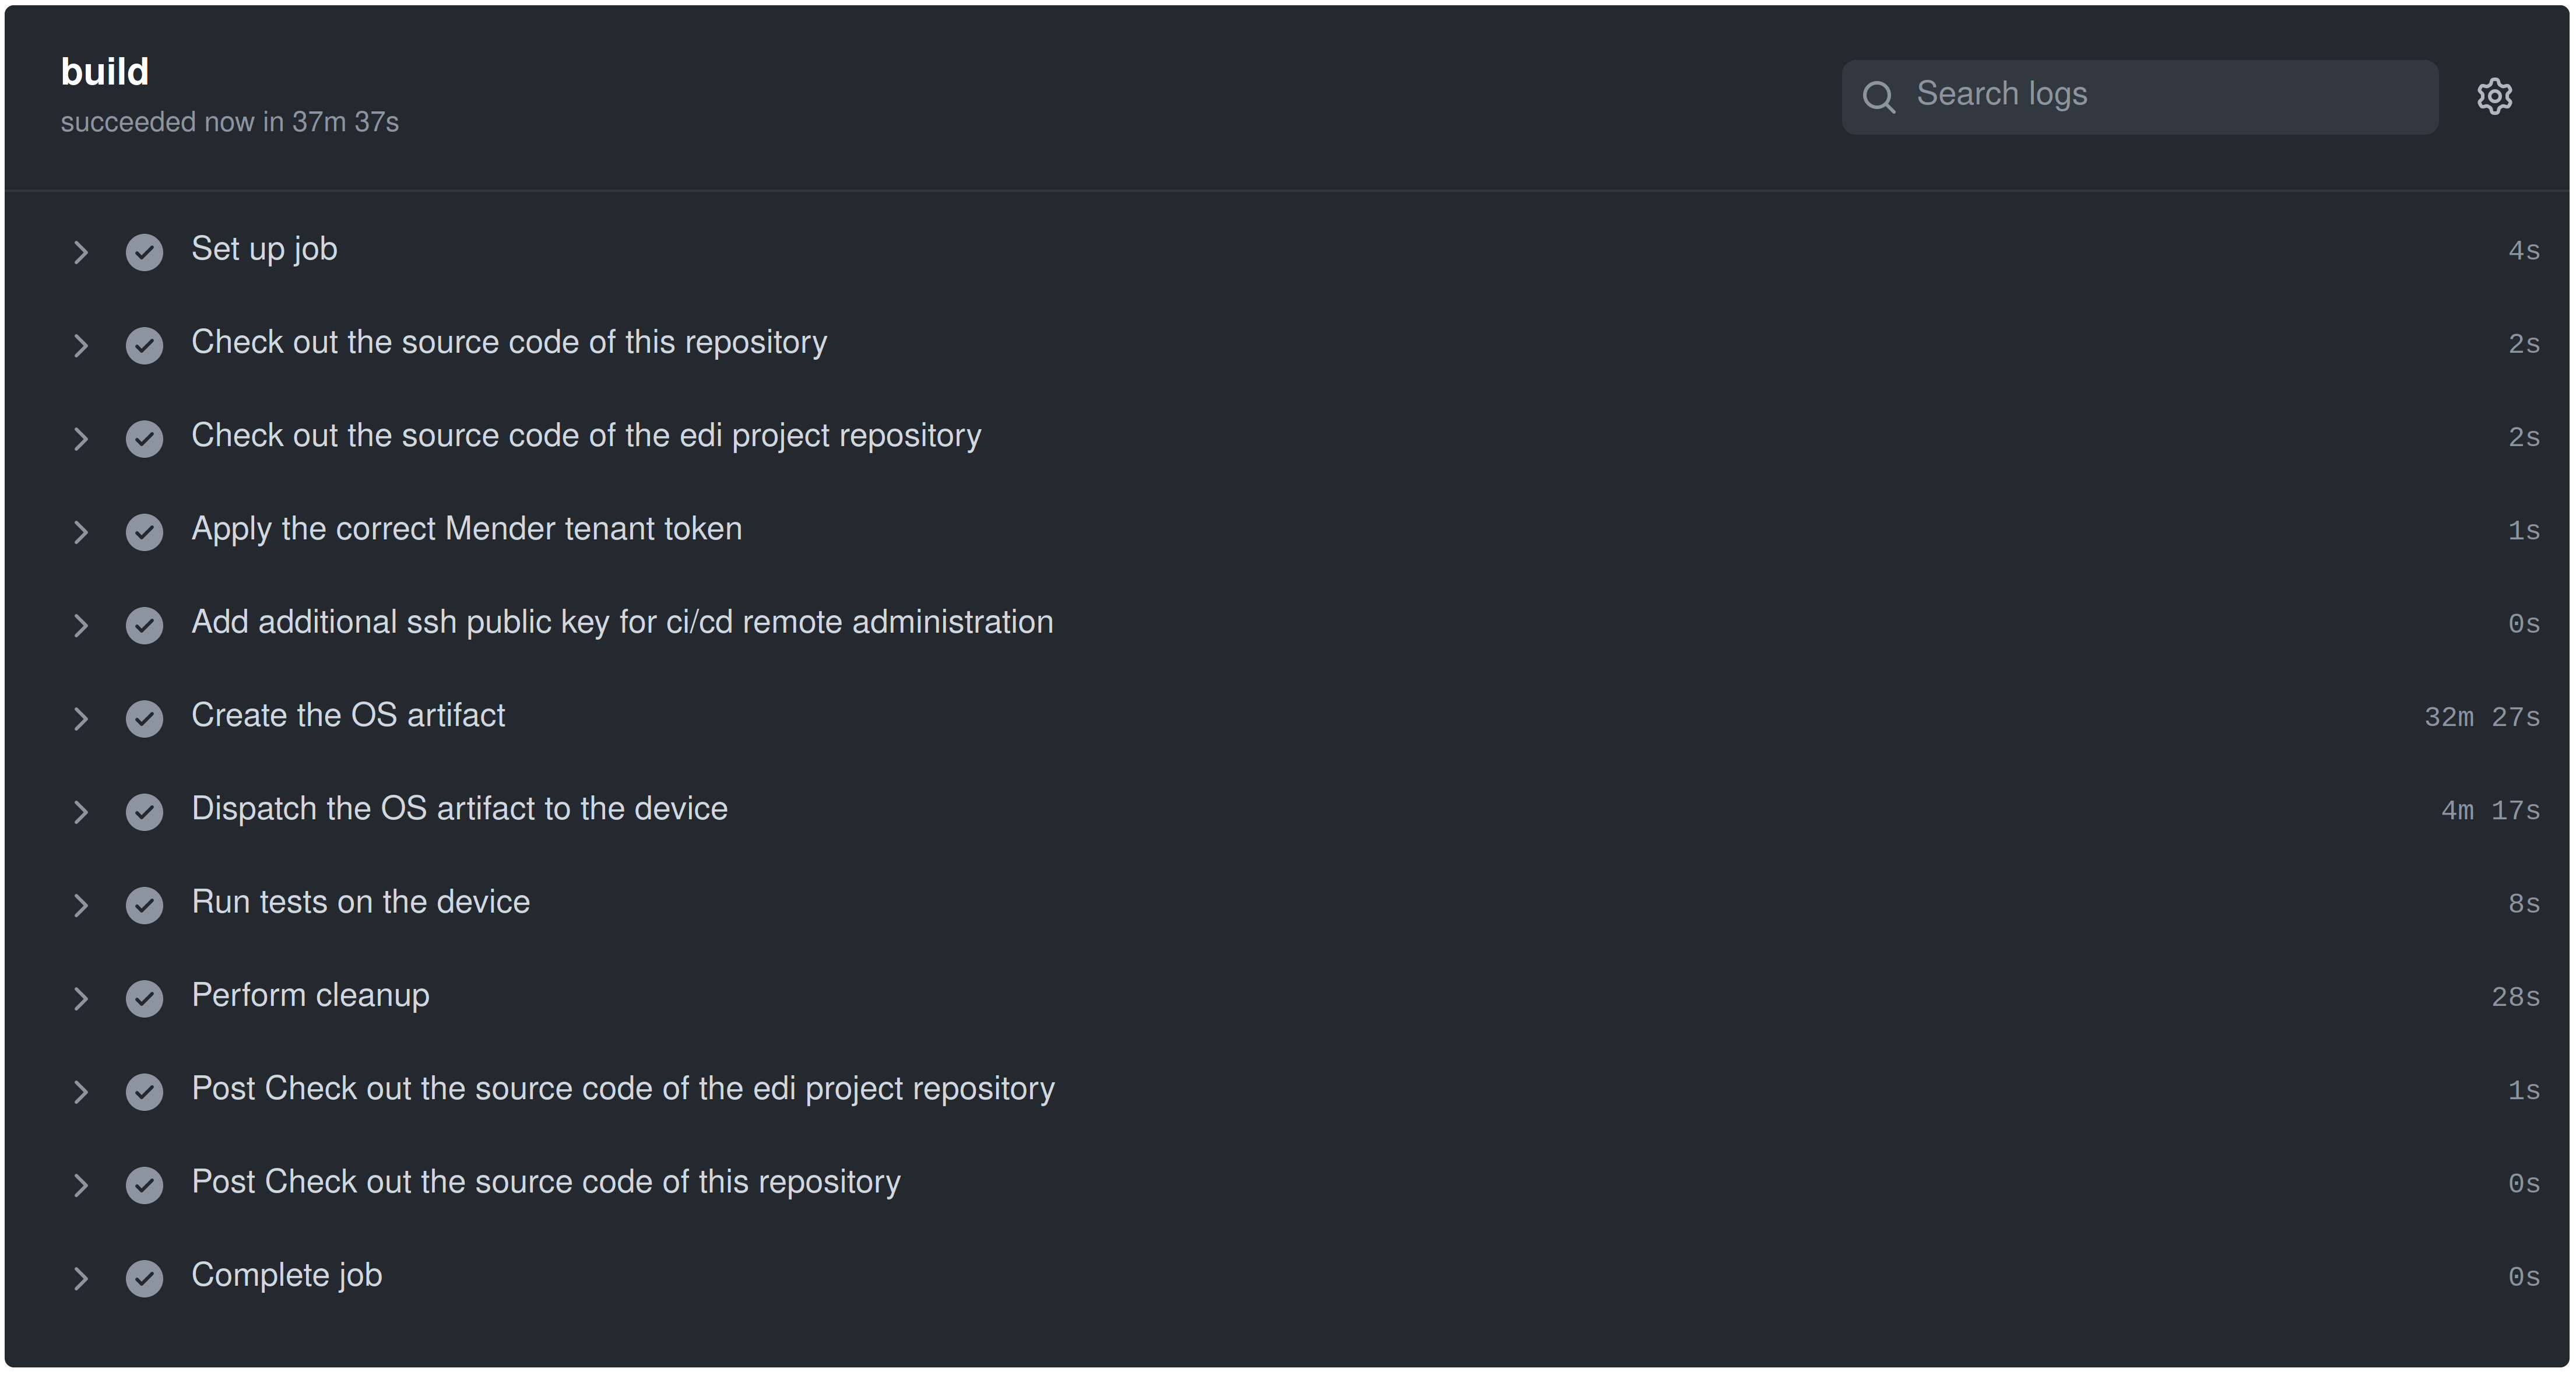
The attentive reader will now ask the legitimate question: Where does the workflow know the various credentials from?
Using GitHub Actions you have the possibility to store encrypted secrets.
I have summarized the required secrets here.
Conclusion
After having completed all this automation, I can now enjoy the flow of the bike trail while my edi OS workflow is running. If something should go wrong, then a GitHub e-mail will make me aware that I have to fix something once I am back home.
The whole stuff presented here should be helpful also for other edi based projects. Apart from GitHub Actions I did not introduce any new technology. Instead, I was re-using already familiar tools (Ansible, Mender, Debian, pytest and edi) and hardware.
It should also be fairly easy to use Jenkins or GitLab instead of GitHub Actions.
Leave a comment