Running GUI Applications Within LXD Containers
In my previous blog posts about using containers for embedded development I have explained most of the things using command line commands. I hope that this convinced you that you can become a real nerd and do everything from the command line. The fancy integrated development environments (IDEs) are anyway just something for beginners! No?!
Ok, then you should read on. Honestly, I am also a huge fan of good IDEs and in this blog post I will show how you can add your favorite IDE to your cross compilation LXD container (e.g targeting Raspbian or pure Debian).
Prerequisites
The instructions below make use of the gpu device that got introduced with LXD 2.7.
Therefore I recommend that you use Ubuntu Bionic Beaver (18.04 LTS) as your host operating
system or that you upgrade your LXD installation at your own risk if you decide to stay
on Ubuntu Xenial Xerus (16.04 LTS) for some more time.
The following instructions have been tested on Ubuntu 18.04.
Building the Container
Given you have installed the tool edi according to
this instructions
and cloned the edi-pi project configuration repository from GitHub:
git clone https://github.com/lueschem/edi-pi.git
cd edi-pi
You are ready to grab a cup of tea until your armhf cross compilation container (named edi-pi23-cross-dev) for Debian stretch is built:
sudo edi -v lxc configure edi-pi23-cross-dev pi23-stretch-armhf-cross-dev.yml
Please note that the above command will generate a privileged container which will save us a few steps in the instructions below.
Preparing the GPU Passthrough
The following steps need to be done once per container and they are executed on the host system:
First we make the X server socket available within the container:
lxc config device add edi-pi23-cross-dev xorg-socket disk path=/tmp/.X11-unix/X0 source=/tmp/.X11-unix/X0
Then we share the .Xauthority file - which is needed for X server authentication -
with the container:
lxc config device add edi-pi23-cross-dev ${USER}-Xauthority disk path=/home/${USER}/.Xauthority source=${XAUTHORITY}
And finally we make some GPU specific files available within the container:
lxc config device add edi-pi23-cross-dev host-gpu gpu uid=0 gid=44
We are already done with the preparation!
Running QtCreator From Within the Container
First, we have to retrieve the IPv4 address (CONTAINER_IP) of the container:
lxc list edi-pi23-cross-dev
Now it is time to enter the container:
ssh CONTAINER_IP
One of my favorite IDEs for C/C++ development is Qt Creator. We can directly install it from the Debian repository:
sudo apt install qtcreator
And launch it after having set the DISPLAY environment variable:
export DISPLAY=:0
qtcreator
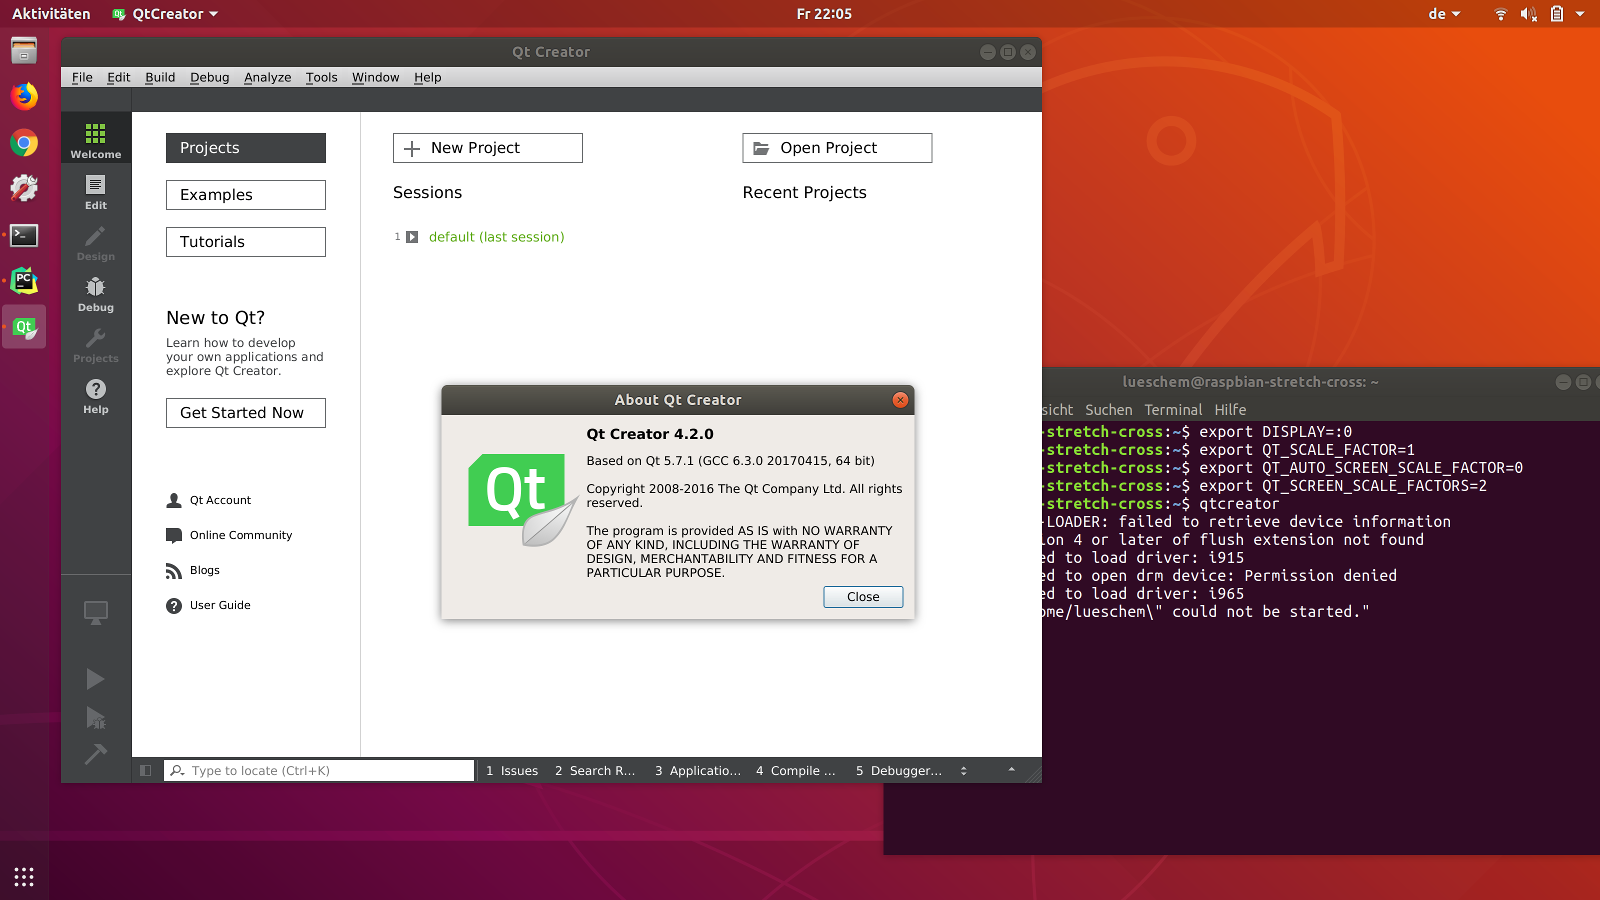
On a high dpi screen you might want to adjust some scaling factors prior to starting Qt Creator:
export DISPLAY=:0
export QT_SCALE_FACTOR=1
export QT_AUTO_SCREEN_SCALE_FACTOR=0
export QT_SCREEN_SCALE_FACTORS=2
qtcreator
If everything went fine, the Qt Creator that you have launched within the Debian stretch container should seamlessly appear on your Ubuntu desktop:
Adding Convenience
Now it is time to make our setup a bit more convenient. Still within our container,
we add a line to our ~/.profile file that will automatically export the DISPLAY
environment variable:
echo "export DISPLAY=:0" >> ~/.profile
Now we create a launch script for qtcreator within the bin folder of our user:
mkdir -p ~/bin
touch ~/bin/qtcreator && chmod +x ~/bin/qtcreator
vi ~/bin/qtcreator
with the content:
#!/bin/bash
export QT_SCALE_FACTOR=1
export QT_AUTO_SCREEN_SCALE_FACTOR=0
export QT_SCREEN_SCALE_FACTORS=2
/usr/bin/qtcreator
And we now quit the container:
exit
Back on the host we modify our ssh setup by adding the following configuration
to the ~/.ssh/config file:
Host edi-pi23-cross-dev
    Hostname CONTAINER_IP
Please replace CONTAINER_IP with the IPv4 address you retrieved using the command
lxc list edi-pi23-cross-dev.
Launching qtcreator from your Ubuntu host is now as simple as this:
lxc exec edi-pi23-cross-dev -- sudo --login --user ${USER} qtcreator
With the following command you can enter the container:
ssh edi-pi23-cross-dev
Conclusion and Acknowledgement
At some point in the future it might be possible to run an IDE on the host system and do all the heavy lifting like compilation and debugging within a container. Right now it is just a lot simpler to run the IDE on the same system as the compiler and other tools. This blog post illustrates how you can do a seamless integration for such a use case.
The setup described above can also be applied to the cross development toolchain that
I have adapted for Raspbian and obviously it is not limited
to qtcreator. Please feel free to try out your favorite IDE like PyCharm, eclipse or
whatever it is.
A special thanks goes to Simos Xenitellis: Please read his blog post if you you want to get more background information.
Leave a comment